

Speed Cushion Installation Requirements: A Step-by-Step Guide
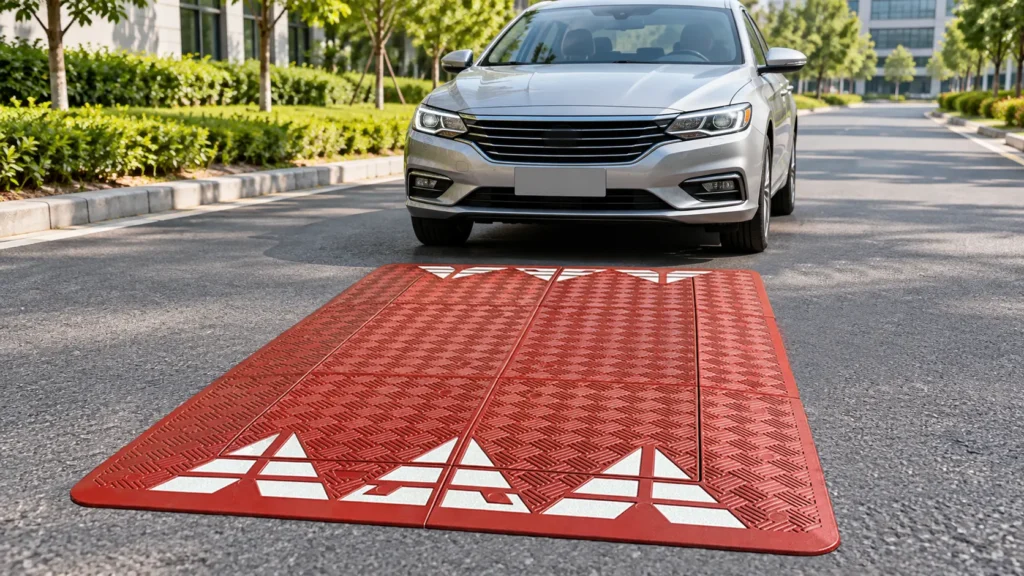
Bolt-down speed cushions are a practical traffic calming solution for reducing vehicle speeds without blocking the road. When planned and installed correctly, they slow cars and allow buses and emergency vehicles to pass more easily.
A good installation should do three things:
- Reduce speed at the right point
- Stay fixed under repeated traffic
- Provide a clear route for every road user
The key is not just to put the speed cushions on the road surface. It is choosing the right location, setting the correct distance, and using fixings that suit the road surface.
Discover our full range of Speed Cushions!
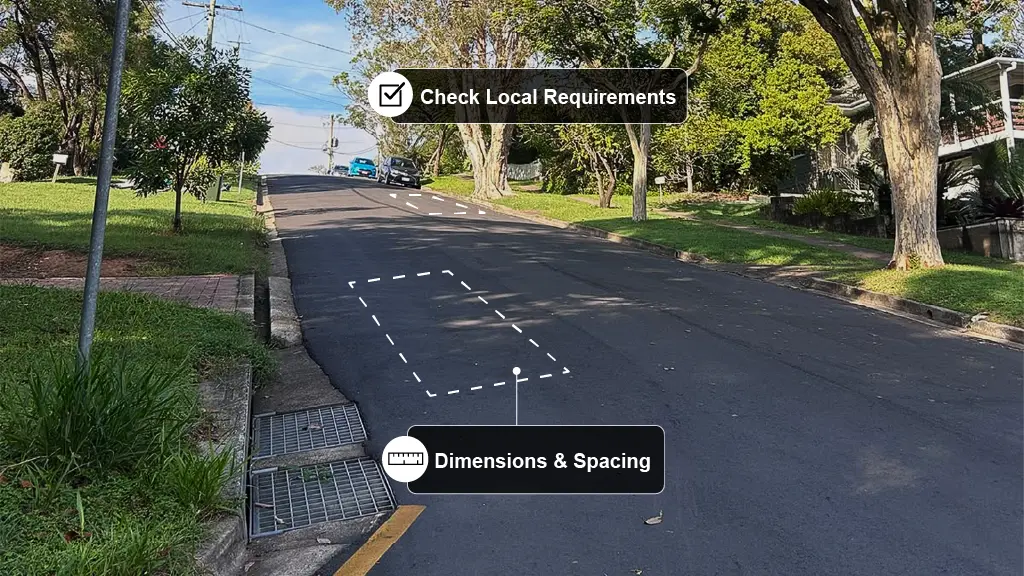
Confirm the Site Requirements Before Starting
Inspect the site carefully. Before installing speed cushions, check the road layout, traffic volume and the types of vehicles that use the route.
Confirm:
- Permission: Who must approve the installation?
- Visibility: Can drivers see the cushions in time to slow down?
- Road condition: Does the road surface need repairs?
- Signs and markings: Are warning signs or road markings needed?
Do not install speed cushions on badly cracked or uneven road surfaces. Every section must sit flat.
Tools and Fixings You Will Use
The fixings must match both the speed cushion and the road surface. Concrete normally requires masonry anchors, while asphalt may need longer bolts or specialist anchors.
Sino Concept speed cushions come with one set of mounting hardware that works on both concrete and asphalt. You do not need to buy different fixings for each surface, so installation is simple and efficient on any site. It can be installed in under 30 minutes.
Common tools include:
- Tape measure, marker and chalk line
- Broom or blower
- Rotary hammer and suitable drill bit
- Impact wrench and socket
- Rubber mallet
- Approved bolts and anchors
- Cones or temporary traffic barriers
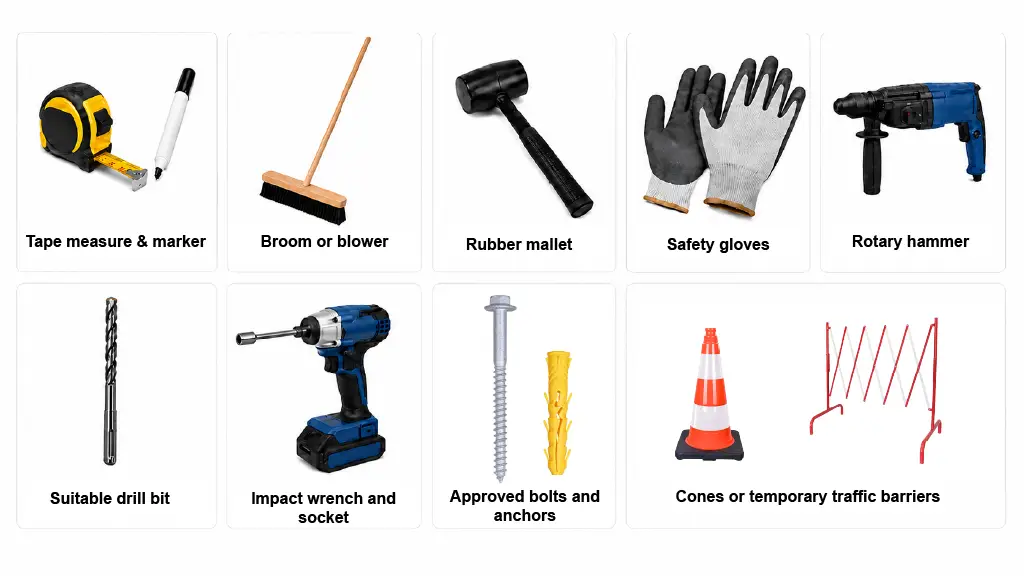
The right tools do more than speed up the work. They help each speed cushion sit flat, keep the fixings secure, and make the installation safer from start to finish.
Choose the Right Location for Your Speed Cushion
Drivers must be able to see the speed cushions early enough to reduce speed smoothly.
Use these dimensions as general guidance, subject to local UK requirements:
- Spacing between successive rows: Leave 60–100 m between rows of speed cushions. We recommend around 70 m.
- Gap between adjacent cushions: Leave 750–1,200 mm between cushions placed side by side, ideally around 1,000 mm. If the gap is too wide, cars can drive through it and miss the cushions.
- Distance from the kerb: Leave 750–1,200 mm between the outer cushion and the kerb. This gives cyclists a clear route without allowing cars to avoid the cushions easily.
- Distance from a pedestrian crossing: Keep the cushions at least 30 m from a zebra crossing and outside the zig-zag area.
- Distance from railway tracks: At a level crossing, keep the cushions at least 20 m from the nearest rail.
- Distance from tram tracks: Leave at least 2 m between the cushions and the tracks.
The right spacing helps drivers slow down smoothly, gives cyclists room to pass, and makes the cushions work as intended.
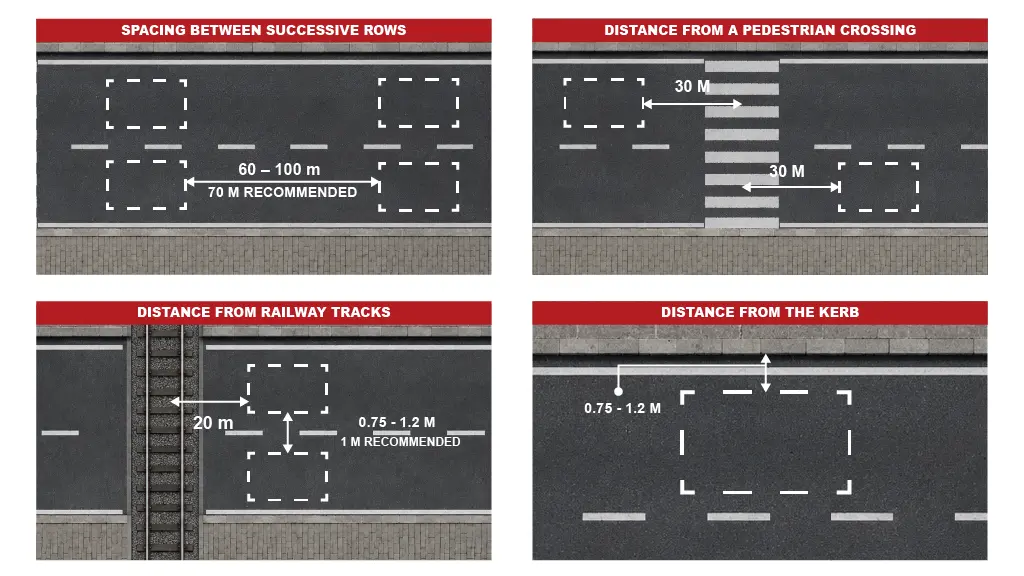
Mark each cushion position with chalk. Measure again before drilling. You cannot move the holes later.
Follow Our Easy Step-by-Step Installation Guide
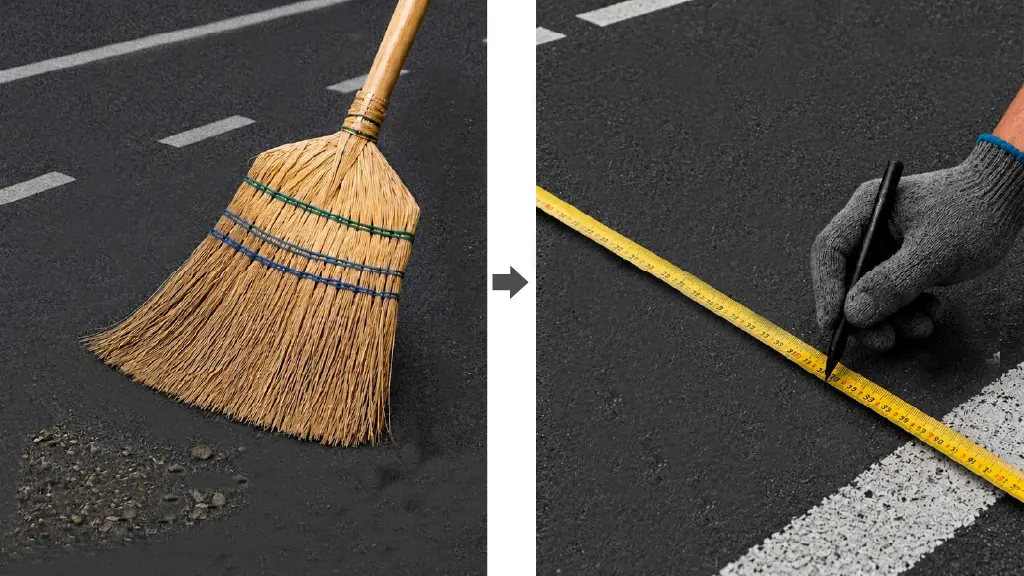
Once the location, dimensions and fixing tools are confirmed, close the working area to traffic and begin installation. The road surface must be clean and stable. Repair serious cracks before installing the speed cushions.
Prepare the Installation Area
Use cones, barriers or signs to create a safe working area.
Use a tape measure to mark the centre and outer edges of the installation.
Place the speed cushion modules in their planned positions. Make sure they are straight, with the correct gaps between them and the correct distance from each kerb.
Connect the Parts with H-Connectors
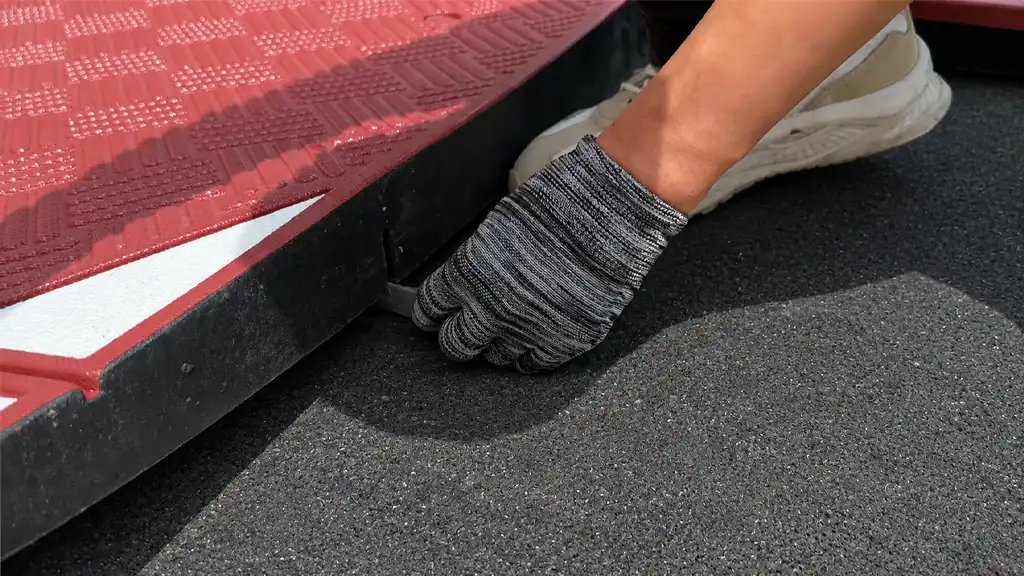
Lift one side of a speed cushion part and insert an H-connector into the slot. Move the next part into position and connect it to the H-connector.
Repeat these steps until all the required parts are connected. Check that they are correctly aligned before marking the fixing holes.
Mark the Fixing Holes
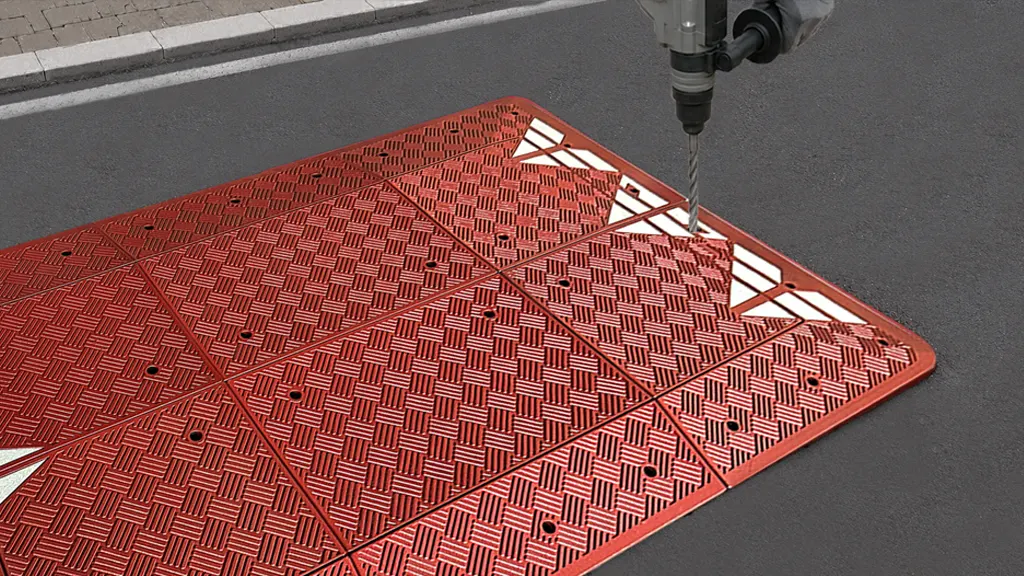
Use a rotary hammer fitted with a Ø12 mm (approx. 0.47″) masonry drill bit to make a shallow mark through each pre-drilled fixing hole.
Before moving the speed cushions, check that the holes will not interfere with drains, covers or underground services. Accurate marking helps every section sit flat.
Drill the Holes
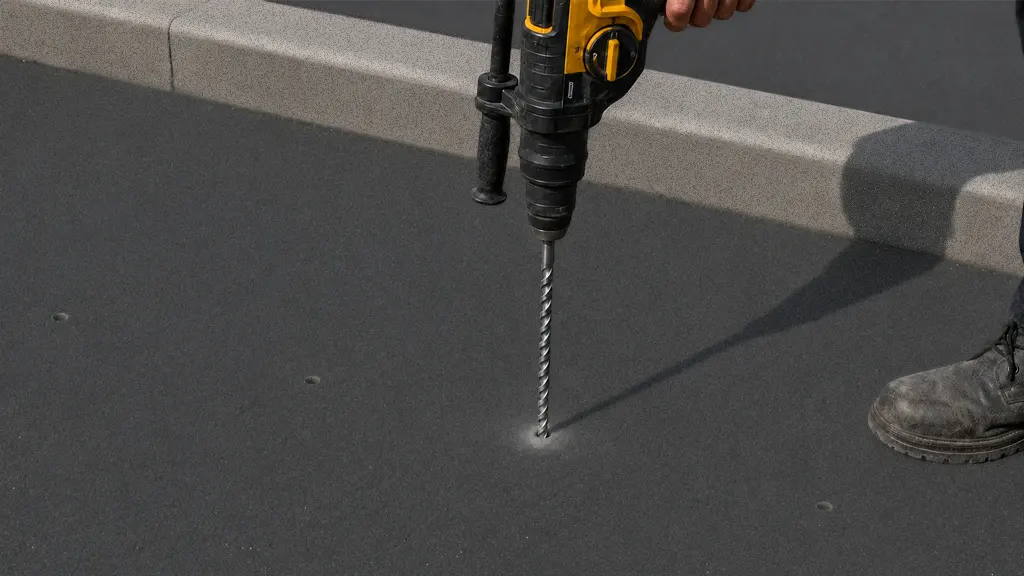
Move the speed cushions, and use a rotary hammer fitted with a Ø18 mm (approx. 0.71″) masonry drill bit. Keep the rotary hammer vertical so the fixings remain straight.
Drill each hole to a depth of at least 115 mm (approx. 4.53″). Oversized holes may prevent the anchors from holding securely.
Remove all drilling dust. Clean holes provide a stronger fixing on both concrete and asphalt.
Secure the Speed Cushions
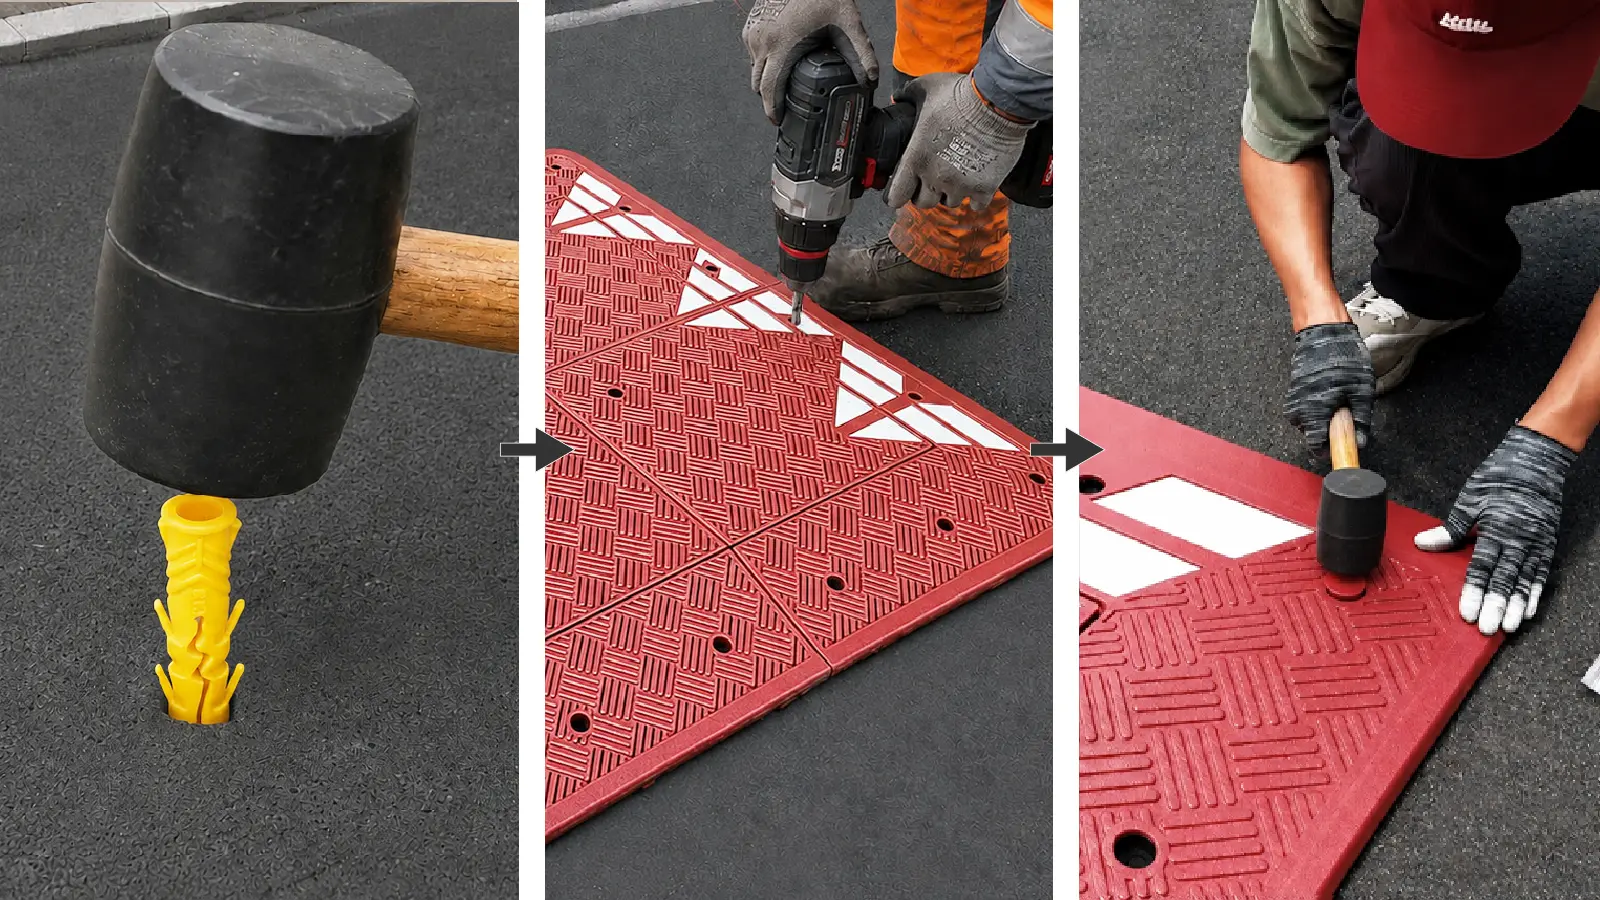
Insert the plastic anchors into the drilled holes using a rubber mallet.
Place the speed cushion parts back in position and align the fixing holes. Secure them with the bolts.
Once all the bolts are secure, fit the protective caps over the fixing holes.
Check the Finished Installation
Before reopening the road, confirm that:
Every bolt is secure
All parts sit flat
Reflective markings are clean and visible
No tools or loose material remain
Allow a vehicle to drive over the cushions slowly. Watch for movement and listen for unusual noise.
Inspect the speed cushions regularly after installation. Tighten loose bolts and replace damaged modules or reflective sections promptly.
Conclusion
A reliable speed cushion installation depends on a suitable location, correct spacing and secure fixings.
Correctly installed speed cushions should reduce vehicle speeds smoothly, remain firmly fixed and maintain a predictable route for buses and emergency vehicles.
The Bolt down speed cushions are surface mounted, so major excavation is unnecessary. Their modular construction also allows individual sections to be replaced if damaged.
Always follow local UK requirements and the manufacturer’s specifications. Regular inspection and maintenance will keep the speed cushions safe, visible and effective over the long term.