Wheel Stop Installation Guide: How to Install Wheel Stops Correctly
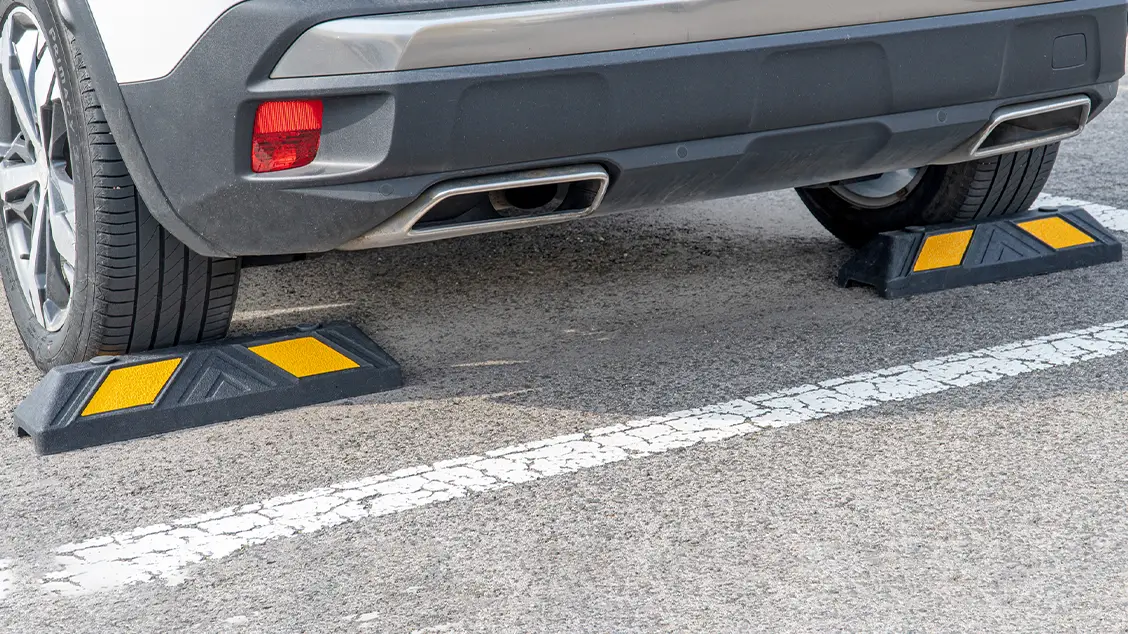
Car park wheel stops are a cost-effective solution for keeping parking areas orderly. When they are planned and installed correctly, they protect property, guide cars, and make the space safer for everyone who uses it.
A good installation should do three things:
- Stop the vehicle at the right point
- Stay fixed under daily use
- Avoid becoming a trip hazard
The key is not just putting a wheel stop into the ground. It is choosing the right place, using suitable fixings, and making sure cars stop before they hit a wall or block a walkway.
Before installation, choosing the right quality wheel stop is also essential. Many importers face quality issues when sourcing low-cost products. Read our guide: Common problems when importing wheel stops.
Discover our full range of Wheel Stops and Parking Blocks!
Before Installing Wheel Stops on Car Parks
Before installation, check the parking area carefully. Wheel stops should solve a problem, not create a new one.
Look at the space and ask:
- Is the surface concrete, asphalt, or another material?
- Where do vehicles usually stop?
- Do heavy goods vehicles or vans use this space?
- Is there a wall, kerb, door, walkway or equipment nearby?
- Will the wheel stop block pedestrians?
A warehouse yard, a loading bay and a retail public car park may all need different placement. You should also check local regulations, wheel stop installation standards and the manufacturer’s instructions.
Tools and Fixings Needed
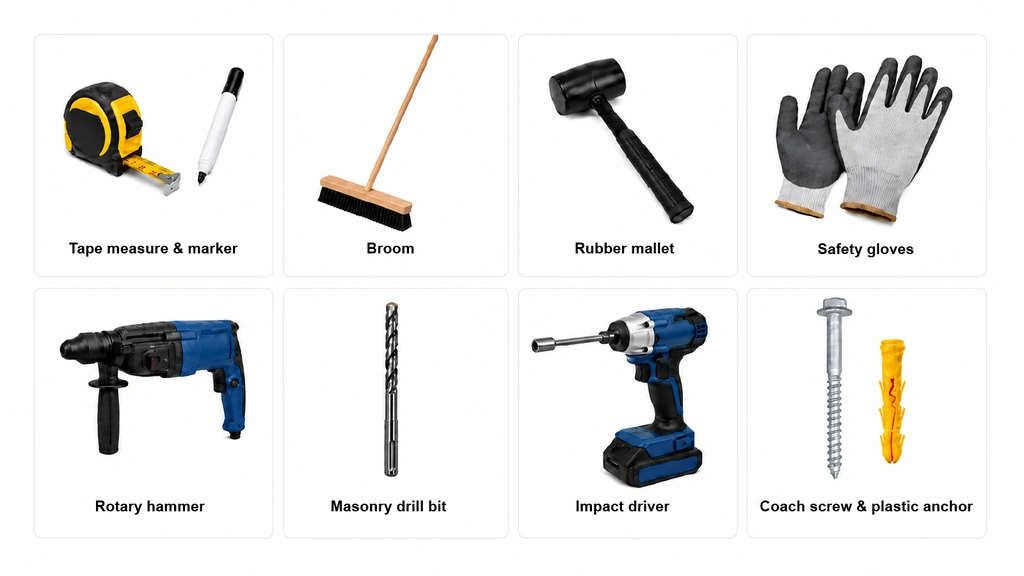
The right tools make the installation cleaner and safer. Most rubber wheel stop installations need basic drilling and fixing tools.
To secure wheel stops, use anchor bolts on concrete and longer fixing pins or specialist anchors on asphalt. Use adhesive only where the product installation guide requires it.
Common tools include:
- Tape measure & marker
- Broom & blower
- Rubber mallet
- Rotary hammer
- Masonry drill bit
- Impact wrench & nutsetter
- Hex flange coach screws & plastic anchors
- Safety gloves
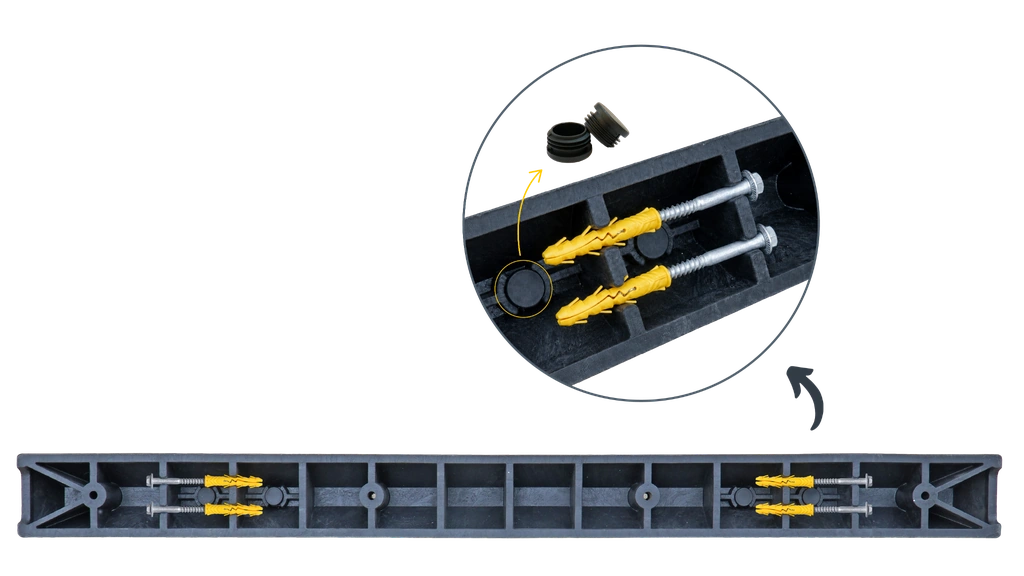
If you choose Sino Concept wheel stops, the mounting hardware is fitted beneath the wheel stop, and it can be installed on either concrete or asphalt surfaces.
Periodic inspections of installed wheel stops and reflective strips are important for longevity. A loose wheel stop is worse than no wheel stop because it creates a hazard and may lead to accidents.
Wheel Stop Placement: Distance from Walls and Kerbs
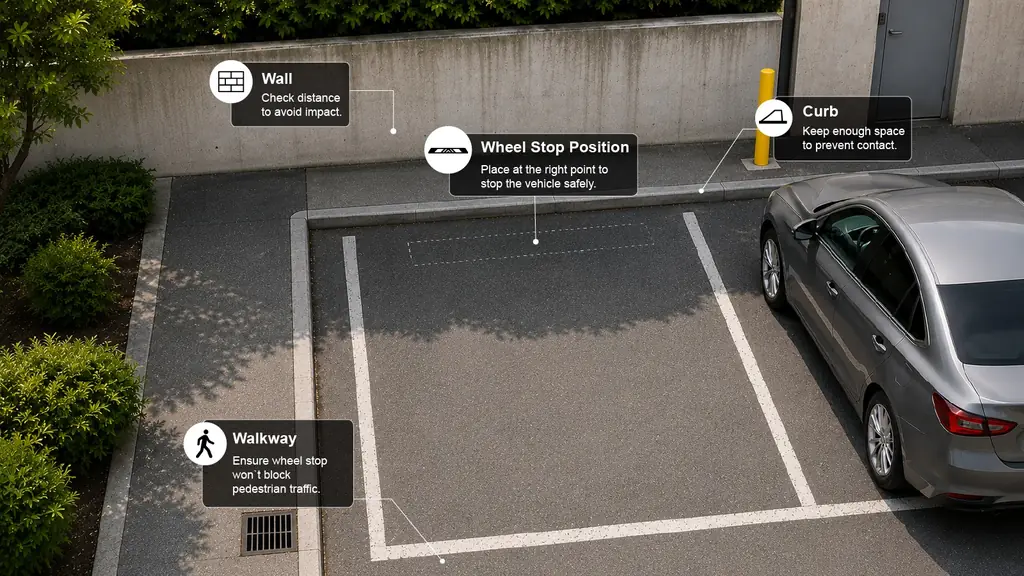
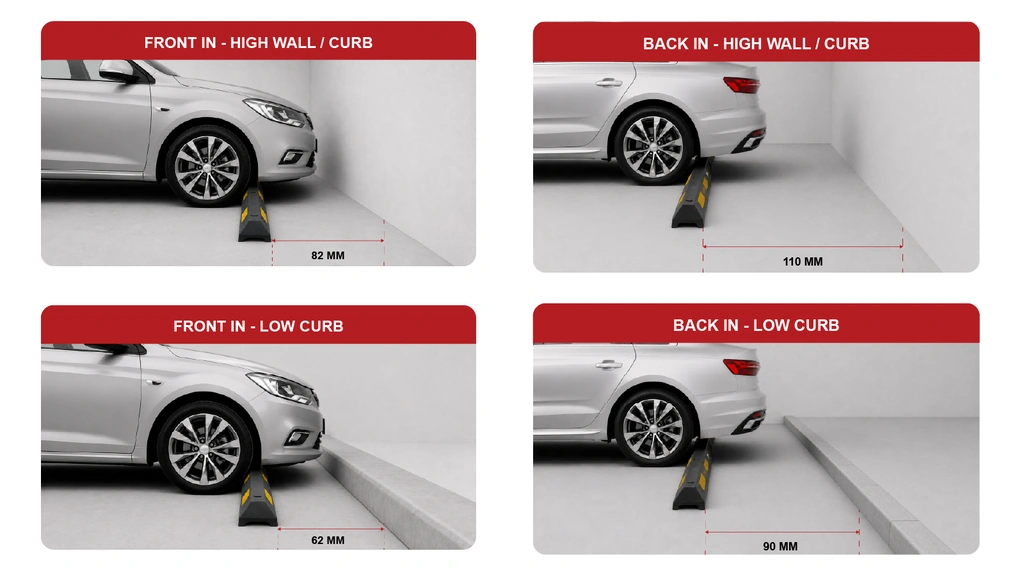
The correct wheel stop distance is important: if it is too close to the wall, the car may still hit the wall. If it is too far back, the car may stick out into the driving lane.
If parking space permits, we recommend placing the wheel stop 1.1 m from the wall (approx. 3′ 7″). Alternatively, refer to the layout shown below.
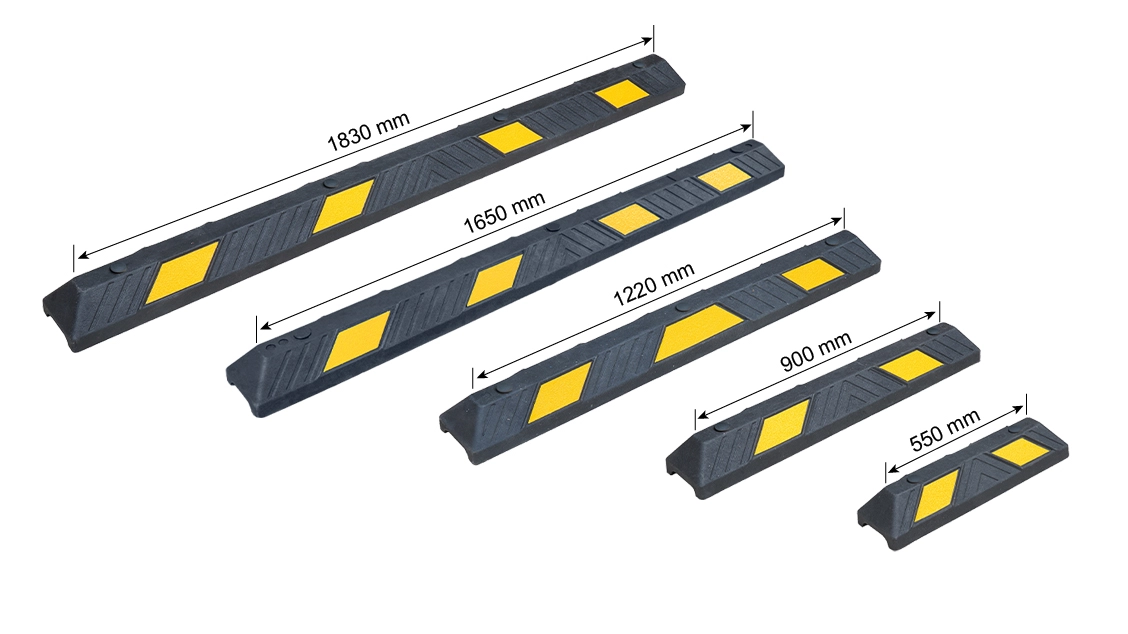
See our Wheel Stop Dimensions Explained for the length and width of each model.
Install Sino Concept Plastic-Rubber Wheel Stops Step by Step
Taking Sino Concept’s 1830 mm wheel stops as an example, a key feature is that all mounting hardware is placed underneath them, making the installation process easier.
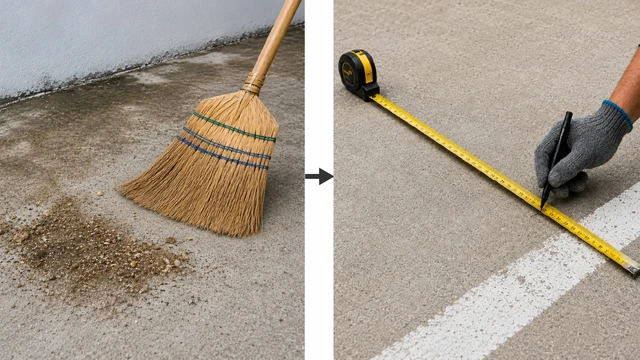
Clean the Area
Remove dust, stones and oil from the installation area. Make sure the surface is clean and has no cracks so the wheel stop can sit flat.
Use a tape measure to mark the required position. Make sure the wheel stop is centred in the parking bay and aligned with the wheel stops in nearby spaces.
Place the Parking Stop
Put the wheel stopper in the desired location. Check that it is straight. Check that it sits flat on the surface and make any final adjustments before drilling.
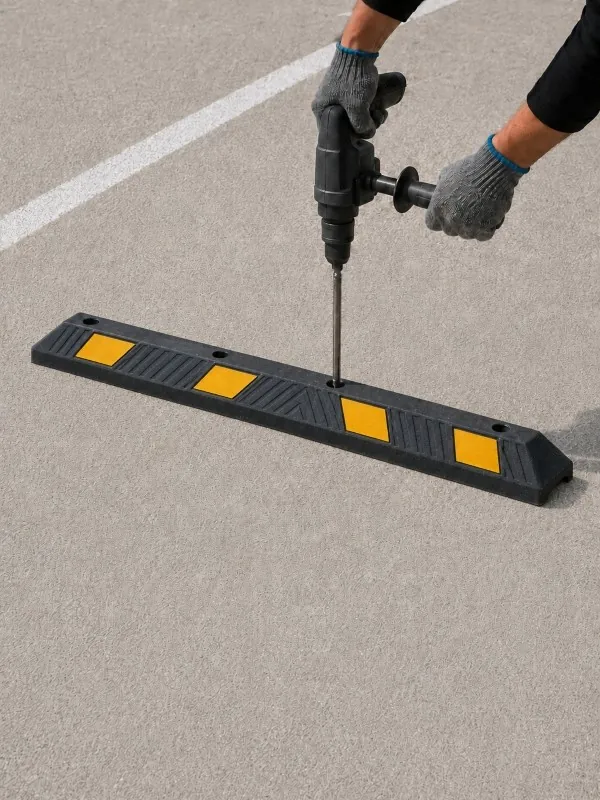
Once the wheel stop is correctly positioned, use a rotary hammer fitted with a masonry drill bit smaller than Ø12 mm (approx. 0.47″) to lightly mark the surface through each mounting hole.
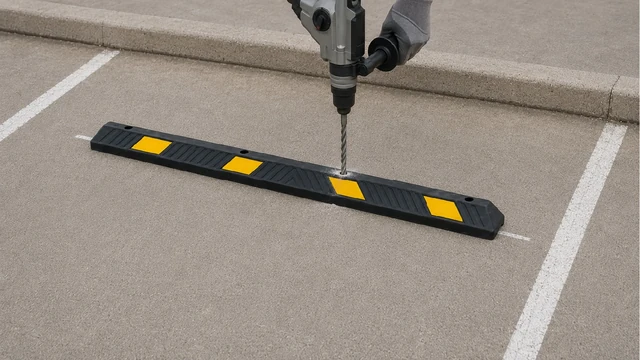
Drill the Fixing Holes
Remove the wheel stop, then use a rotary hammer with a Ø18 mm (approx. 0.71″) masonry drill bit, 260 mm (approx. 10.24″) long, to drill the holes.
Drill each hole to a depth of 115–125 mm (approx. 4.5–5″). Keep the drill straight and remove dust from the holes before inserting the plastic anchors.
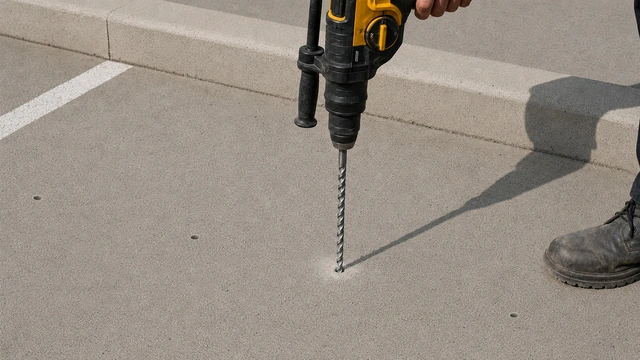
Secure Wheel Stops
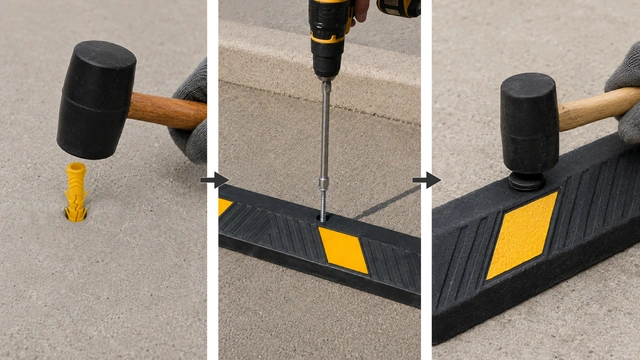
Insert the plastic anchors into the drilled holes using a rubber mallet.
Reposition the wheel stop, then use an impact driver with a 17 mm (11/16″) impact socket driver bit, 75 mm (3″) long, to tighten the hex flange coach screws.
Finally, fit the plastic caps over the fixing holes.
Check the Final Position
Park a vehicle slowly against the wheel stop and check the result. Make sure the vehicle stops in the right place. A well-placed wheel stop provides a cushioned impact to prevent damage.
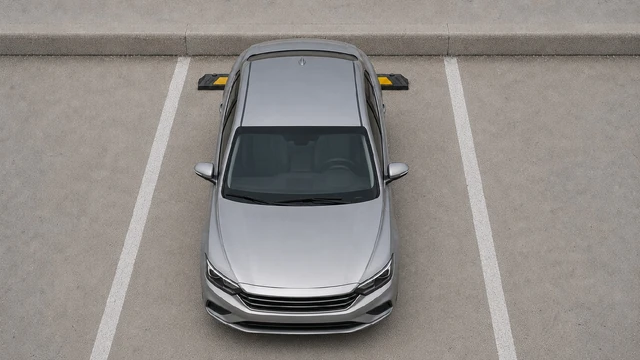
Conclusion
Wheel stops look simple, but they do an important job. They help drivers park in the right position, protect walls and kerbs, and keep vehicles from moving too far into walkways or planted areas.
Many wheel stop problems come from small mistakes during installation. The most common one is poor placement. If the wheel stop is installed without checking vehicle overhang, it may fail to protect the wall or kerb.
A correct installation should feel simple after it is done. Drivers should immediately understand where to stop without thinking too much. Pedestrians should still have a clear path. The wheel stop should stay firm, highly visible, and useful over time.